BMW Forum - BimmerFest BMW Forums banner

E91 Panoramic Sunroof Seal Replacement DIY

38K views 16 replies 8 participants last post by  jimborae  
#1 ·
My 2009 E91 328i wagon has always had a large amount of sunroof wind noise coming from directly over the driver's head since I purchased it 2 years ago. I took it to the dealer to get resolved w/ some other minor issues and they 'forgot' to fix the sunroof problem. Happens that I crossed 50k miles a month later and the CPO warranty doesn't cover seals.
So, I finally got tired of driving w/ the sunroof shade closed and started googling; I came across several posts about about replacing the sunroof perimeter seal for only $30. Time to take the plunge!

The entire job took about 2 hours. The only tool needed was a Torx T25 driver. You'll also need paint prep/ goo gone/ or some degreaser to clean the metal surface before putting the new seal on.
Note: I did this without a Bentley manual or much other guidance. I just went to town! So, your mileage may vary...

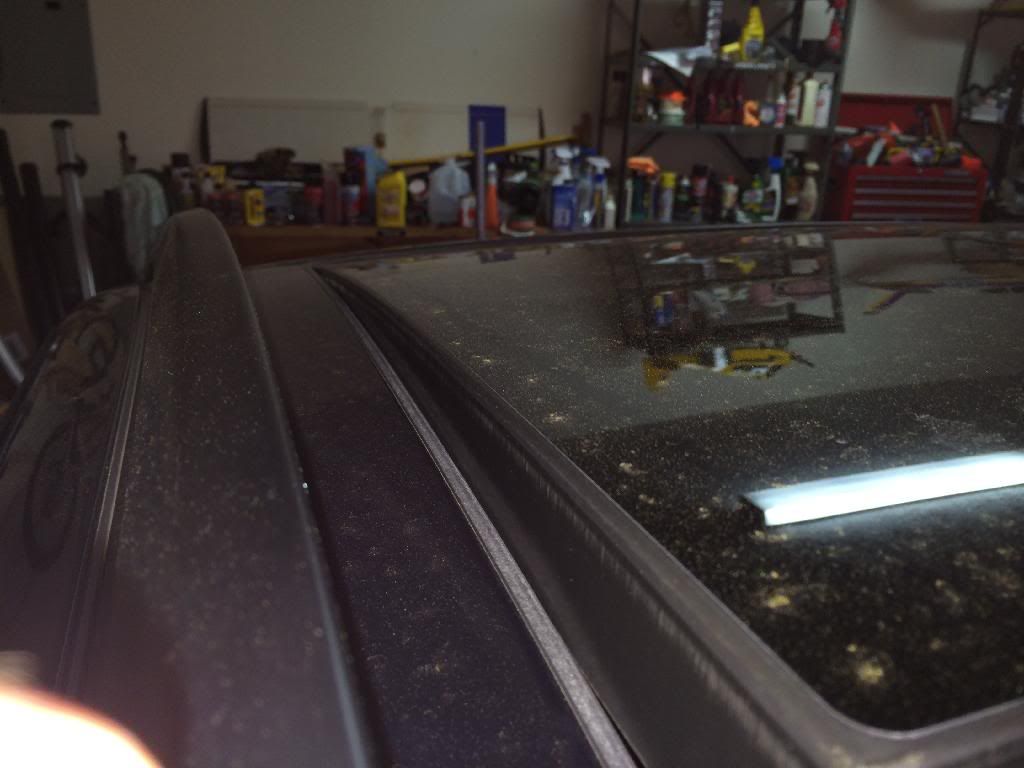
1- Start with the sunroof in the 'vent' postition
2- There were suggestions that you could remove and replace the seal without removing the sunroof glass. Per the pictures, there just wasn't any room between the glass and edges to get at the seal out cleanly, so I removed the glass.
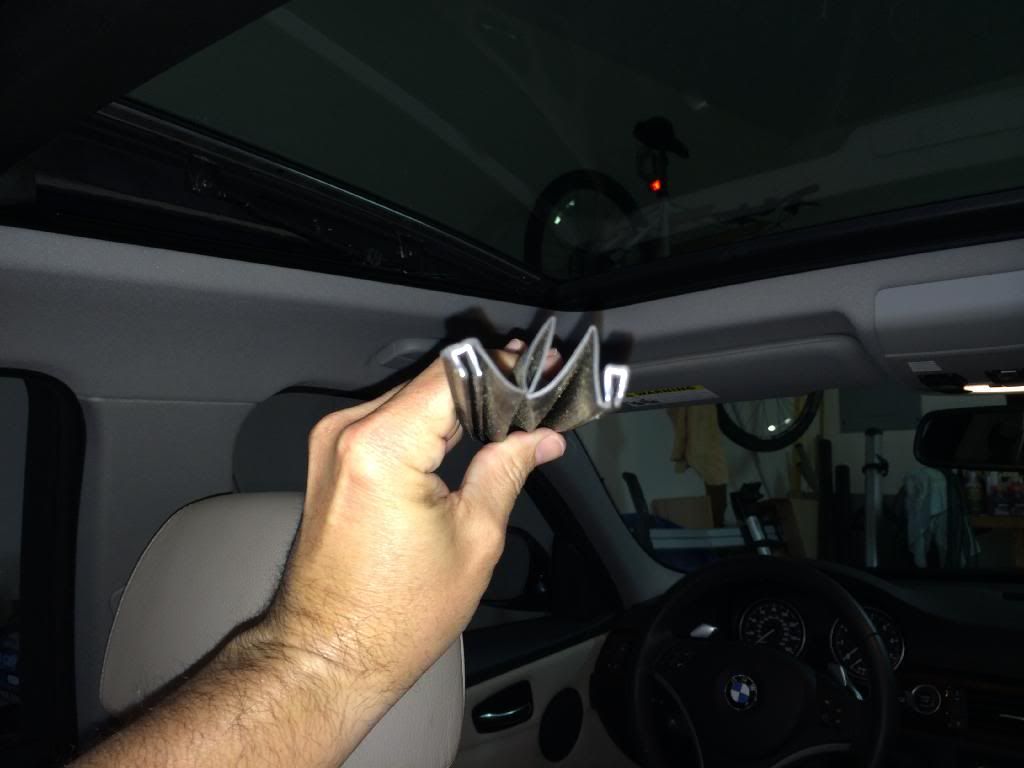
3- remove the 'accordian' cover from both sides of the front glass. It's held on by u-channels on top and bottom. Just start at one end and slowly work it off the rails.

Image

Image

Image
 
#2 · (Edited)
4- The front glass is held on by 3 torx screws on either side. Very easy to get at. The glass just lifts straight out.
5- the rear glass is held on by 2 screws on each side. The front screws are harder to see, but still easy to get at with a torx driver. don't worry about dropping the front screws, you can get them once the rear glass is out. The rear glass mounts were a good bit more difficult to get past the old seal (and put back in). I think a little rotating did the job.
6- put the glass in a safe spot, they aren't cheap! The front piece has a plastic 'skirt'. Be careful not to grab it there.

Image

Image

Image

Image
 
#3 ·
7- Remove the old seal. Start at the seam at the back of the sunroof an PULL. I found that pulling 'up' took more of the adhesive with it than pulling 'out'.
8- the old adhesive that remained on the lip was pliable enough that I just 'rolled' it off with my fingers.
9- I used 'paint prep' to remove any dirt and residue from the lip before applying the new seal.
10- Start at the same spot in the middle of the rear lip and pull just an inch or two of the adhesive tape to start the application. Slowly work your way around by 1st positioning the new seal and pulling the protective tape. I had my son help by pulling the tape slowly while I worked the seal. 1 or 2 spots I didn't have a perfectly flush fit of the seal 'lip' to the roof of the car. I was able to pull the adhesive back a couple inches and re-do it.
11- Carefully use a razor blade to cut the end of the seal. There's extra length to accommodate different vehicles I believe. Just overlap the end of the seal to the beginning and try to cut as close to 90 degrees as you can and maybe 1/32" too long to make a good seal.

Image

Image

Image

Image
 
#4 ·
12- CLEAN! I used Q-tips saturated with white Lithium grease to clean and lubricate the rails. I also cleaned the 'drain pans' with paper towels to get all of the dirt and grit out of there before they eventually clog the drains. I cleaned the pans before I installed the new seal, but there's not really any concern w/ getting the adhesive dirty since you're pulling the tape w/ the seal in-place. My wagon's almost 5 years old and I think the rails were pretty clean (Always garaged).

Image

Image

Image

Image

Image
 
#5 ·
13- Install the glass starting w/ the rear pane 1st. It was a tight fight. The metal mount can easily scratch your roof, so a helper is advised. The rear is a much tighter fit than the front glass. It has to go in flush, but I think I rotated it slightly so that opposite front and back corners just get past the new seal.
14- I used some masking tape on the end of the torx driver to get the screw to stay on the end in order to start the front screws of the rear glass. Tighten all screws to a loose fit.
15- the front glass is much easier. A helper is definitely recommended! 6 screws here; loose fit.
16- Close the sunroof. You can now see how much 'adjustment' is needed to get the glass to sit flush with the top of the roof. According to some of the BMW docs that others have posted, the front lip should be flush or 1mm below the roof line of the car. The front lip of the rear glass should be flush or 1mm lower than the rear lip of the front glass. The rear lip of the rear glass should be flush, or 1mm higher than the rear roof line. I just started at the front screws on either side and worked my way back. Snugged the screws down but left them loose enough to move the glass while adjusting the rear angle.
17- I don't know the exact torque specifications, and didn't bother to look it up :rolleyes: felt like 10ft lbs. I'll update this if I ever find it. Do a final tightening of the screws.
18- 'Re-Initialize' the roof by starting in the fully closed position. Took me a while to figure out that I needed to close the sun screen first. Push 'up' on the sunroof button until it's gone through an entire cycle.

19- I took her out for a test drive and the results were immediate! I recently purchased a X3 and realized how quiet a panoramic sunroof is supposed to be. There is NO wind noise coming from the wagon's sunroof now. I actually hear some noise coming from the driver's window now :mad:

20- Install the 'accordian' covers on either side of the front mechanism by just pressing the u-channels on the metal lips. There was a good bit of 'creaking' from the new seals while going over my driveway curb, so I used silicon lubricant on a paper towel and wiped down the edges of the sunroof glass and seal.

21- DONE! I've attached a comparison of the old and new seal. The new seal looks a little beefier and hopefully will last for another 5 years.

Image

Image

Image

Image

Image
 
#13 ·
I had to tilt from side to side the rear section of glass and then put pressure on the mounting hardware ever so slightly to get it to drop down into place.

Also after seal is in place, silicone the 7734 out of it.

And another tip.... run through the teaching cycle a couple of times before looking to adjust the glass. I lined mine back up from the washer marks and after the first teaching cycle and the subsequent under voltage I ran it a couple more times. But on the second run the front glass was about 5mm high on the rear. So, ran it again and it came a little closer. Ran it a 4th time and everything lined back up like it was before. Probably will let the seals "rest" for a week and then run a cycle again.
 
#15 ·
Aloha Everyone, I'm new to the site and registered as a user, I'm not able to see any of the pictures from the post....is there a reason? Please help as I need help with my E91 Panorama.
Because Photobucket started charging people for linking the persons own photo into websites.

There are some plug-ins that work with Chrome and possibly Firefox that will get around this issue.