

MODS PLEASE STICKY
Thanks to E39Dream for helping me when i did it and being patient to answer my questions.
DISCLAIMER:
I am not responsible for any damages to your car upon using this or any other DIY write up. You assume all responsibility for damages or improper installation to your car.
Hello,
Here is a write up for a E39 Aux fan change. This was done on a 1999 528I and may differ slightly for your car.(resistors)
Job difficulty
2.5 wrenches out of 5.
Tools Needed
-1/4' ratchet
-3/8' ratchet
-8mm socket
-10mm socket
-13mm socket
-Needle nose pliers
-T45 torx bit
-8' extension
Parts Needed
- Auxiliary fan assembly - see No. 5 in link below
http://realoem.com/bmw/showparts.do?...& hg=64&fg=55
-Resistor No. 08 on link above.
- 50 amp fuse
- various fuses.
- Rivets Nos. 22 and 31 ten of each
http://www.realoem.com/bmw/showparts...& hg=51&fg=15
before ANYTHING.
Turn your ac on after your car has been operating for a while and is HOT
60 degrees and wait, if fan turns your aux fan is fine, if not you have a problem.
I have been told it can be your aux fan assembly itself, blow fuse, OR coolant temp sensor, or failed relay (ive been told this is very rare.)
FIRST THING, check the fuses in your glove compartment,
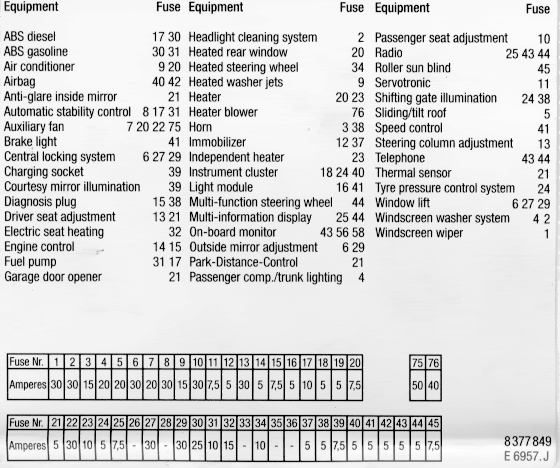
Fuses in glove compartment guide
![Image]()
This is a pic of fuse 75 and 76 lookin lying down above into your glove compartment from the passenger side foot well. That panel needs to be pulled BACK towards the passenger side seat with SLIGHT pressure to the floor and should come out. THE AREA THAT 75 and 76 are in is circled. you will reach in there, and grab the fuse and push UP towards the sky and it will come out.
![Image]()
Preparation
park your car on a flat leveled surface or your driveway.
put a blanket or sheet infront of your bumper, and set weights down so it doesnt fly away, i used my tool box.
here we go!
1-
Use the 8mm bolt to remove the 4 bolts that hold the headlight. Make sure you remove the bulbs from the housing of the headlamp.
there are 4 screws 2 on top and 2 on bottom.
![Image]()
2-
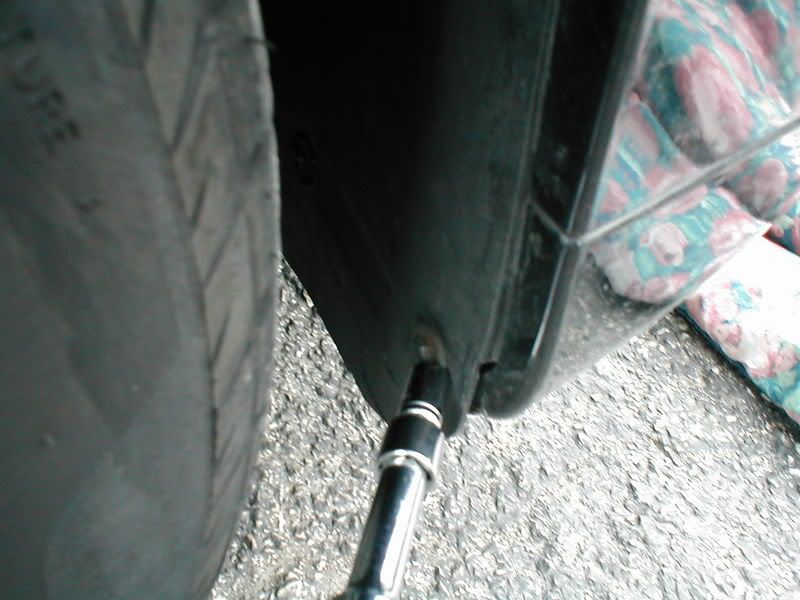
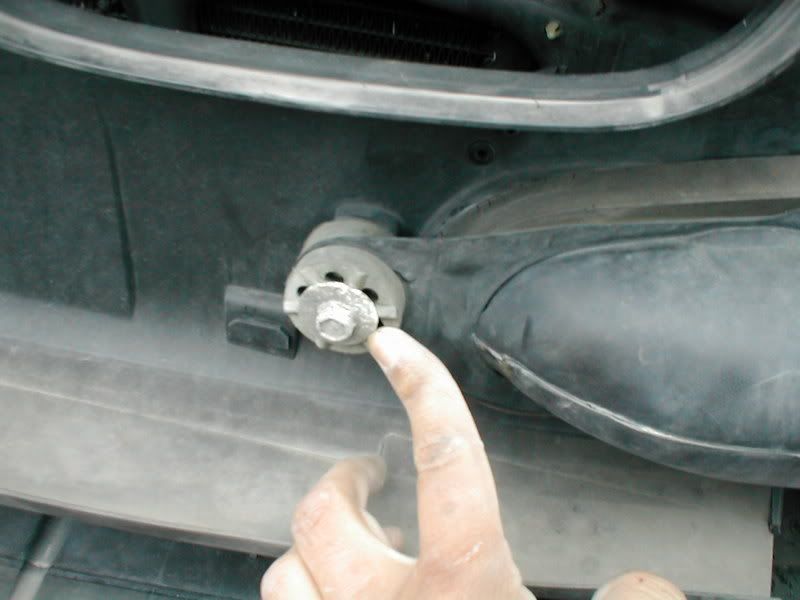
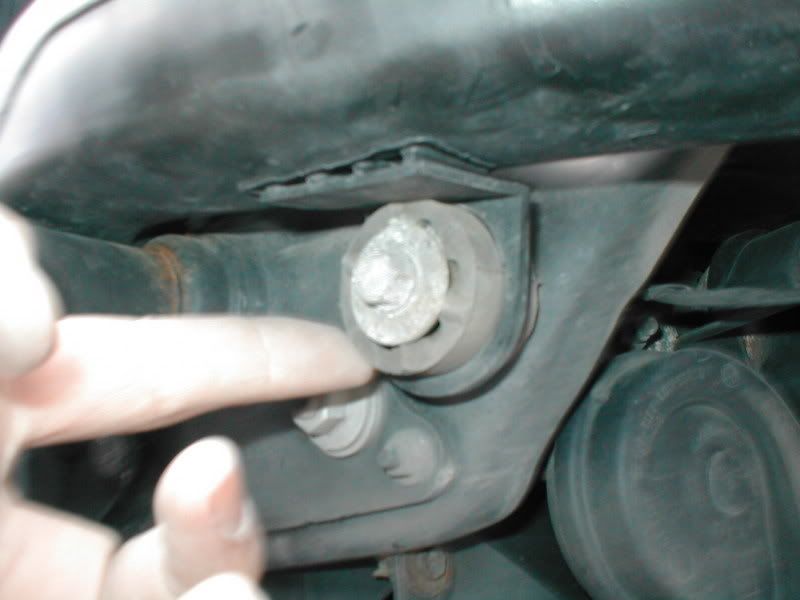
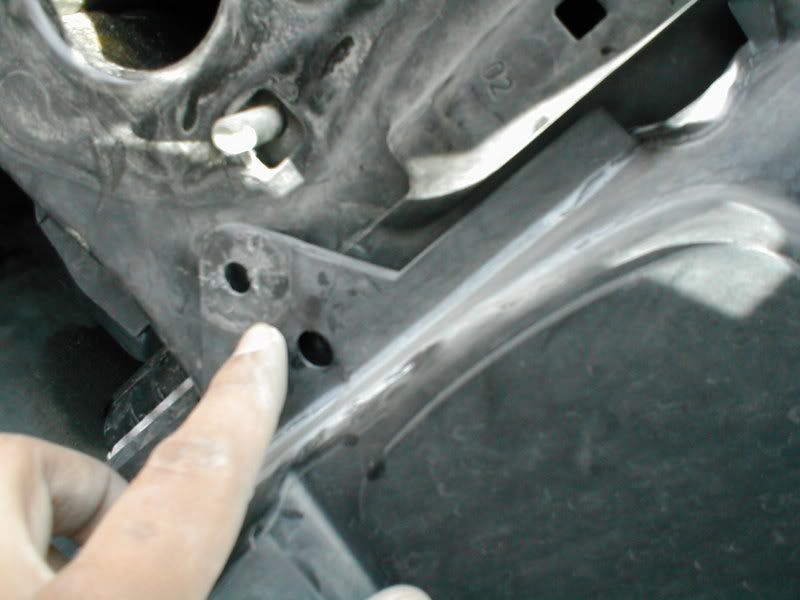
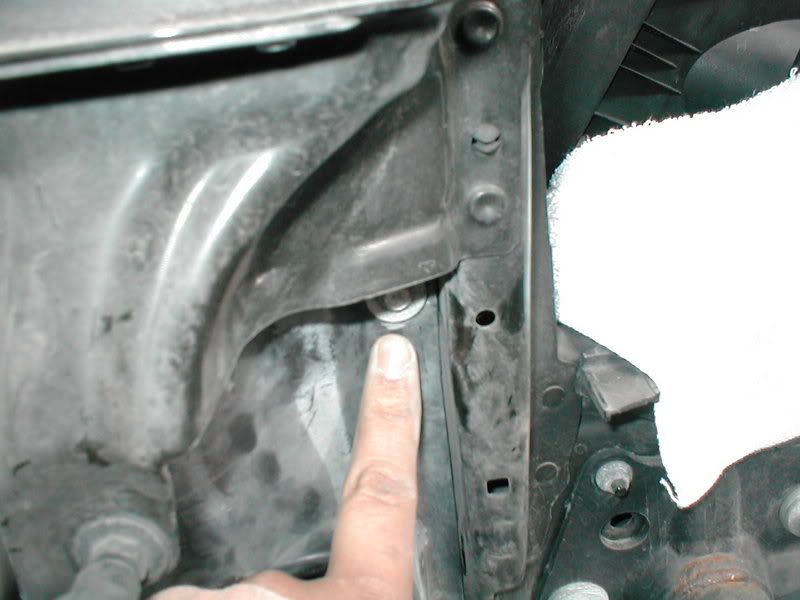
Remove 3 bolts from your wheel well, 1 above and 2 on bottom. refer below
Top bolt
![Image]()
Bottom bolt-the second one is just left to that, it may help to turn your tires side to side.
![Image]()
3-
Go and lie down on the sheet you just put in front of your front bumper.
You will look above the grills in your bumper and see little buttons, these are the plastic rivets. MAKE SURE YOU BUY EXTRA ONES FROM THE DEALER. 10 OF EACH TO BE ON THE SAFE SIDE IS WHAT I DID.
use the needle nose pliers and pull away the center pin, and pull out the rest of the rivet. there are about 4 rivets on each grill, pull them all out and pull away the grill.
![Image]()
4-
You will now see T45 torx bolt on the left of your license plate, and the right, the grill covered this area. Heres a pic
find both and unscrew using the T45 bit.
![Image]()
5-
Disconnect fog lights from the back
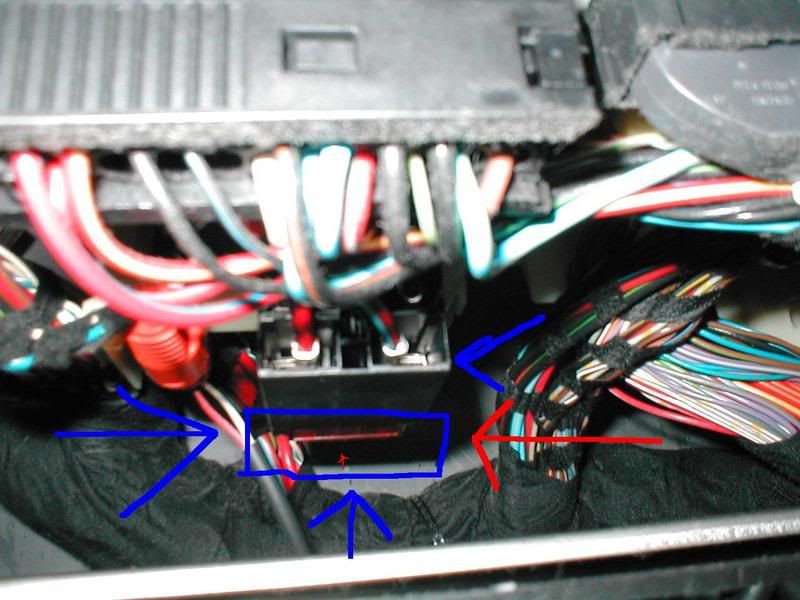
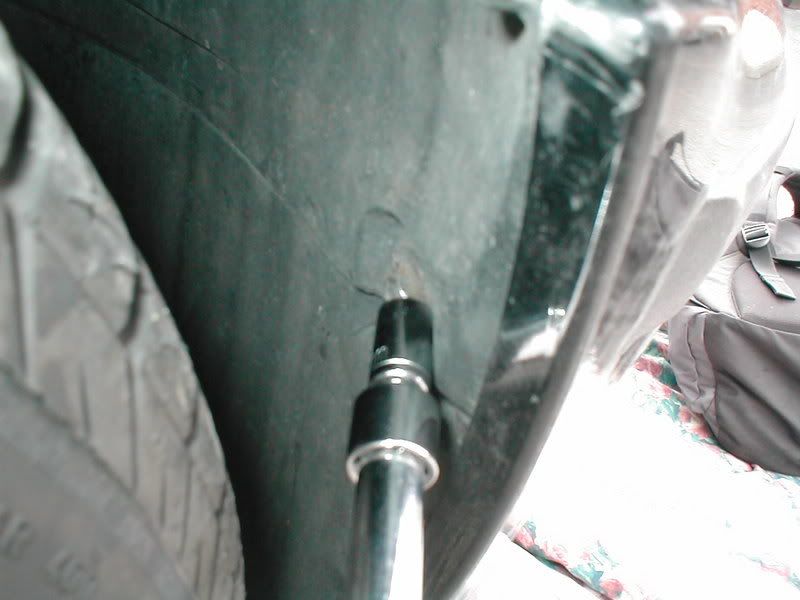
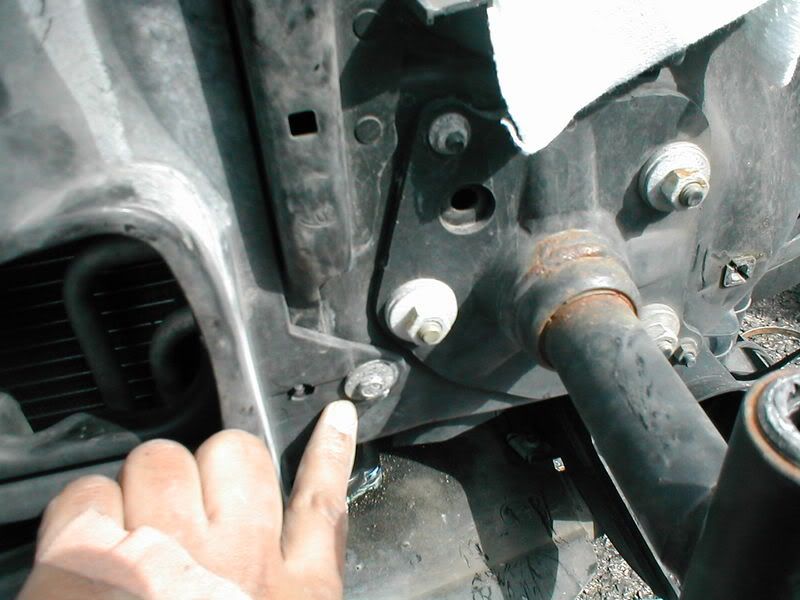
You should now be able to remove the bumper, MINE however was unremovable. so i had to remove the bumper shock absorber
pictured below
This isnt necessary to remove it, but if your having a tough time getting the bumper off, it helps.
after you have done 1-5.
have a friend support the bumper while you go to each side and SLIDE out the bumper from its track, it sits in a sliding track.
![Image]()
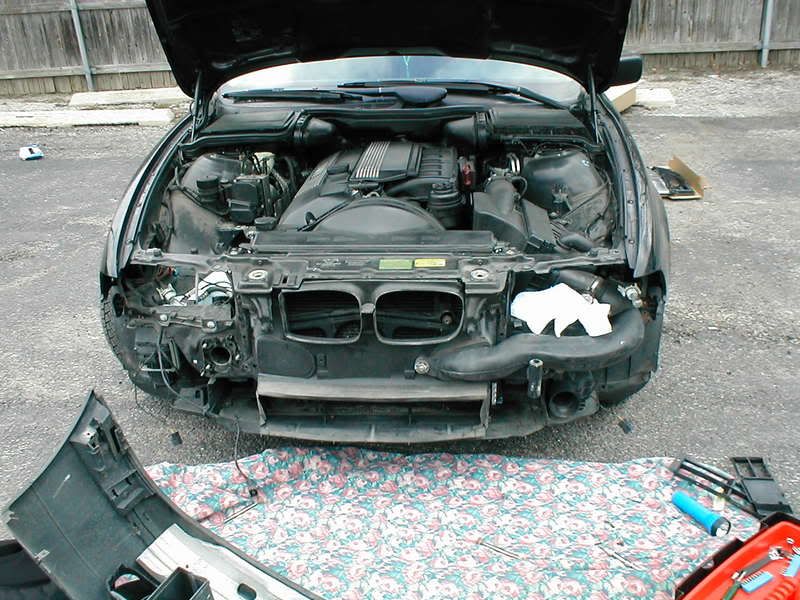
6-
This is what your car should look like now.
![Image]()
7-
Use a 10mm bolt and remove 3 bolts that hold this air snorkel.
the next one is to the right UNDER the snorkel.
last one is all the way to the right. cant miss it.
![Image]()
![Image]()
![Image]()
8-
Use the same method that you used for the grill on these plastic rivets
Remove ALL 3
![Image]()
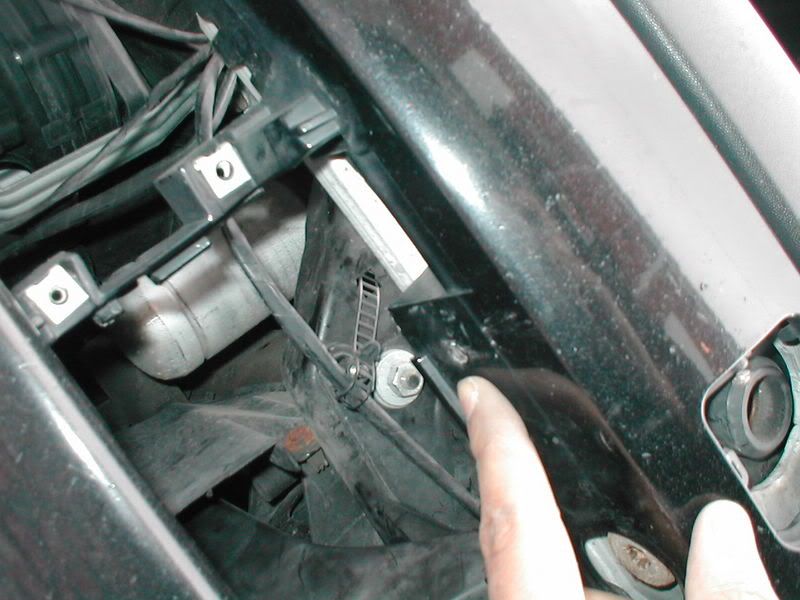
9-
This rivet holds the power supply to the Fan, disconnect the wire this wire from the fan assembly
This is another rivet that i broke, but my dealer gave me a plastic zip tie and said this is better
![Image]()
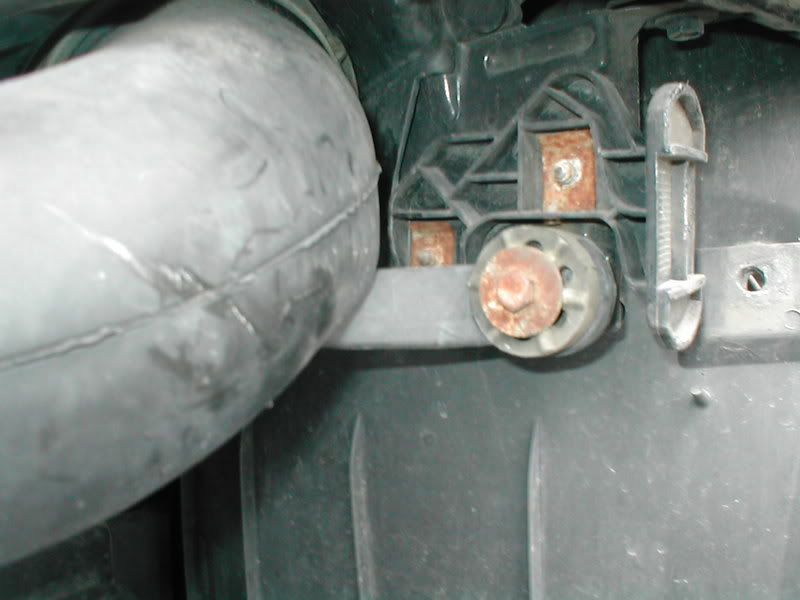
10-
Remove 4 fan bolts, these are the 13mm bolts. there are 4. do the same on the opposite sides
also remove the kidney shroud which you removed the 3 rivets from. BE VERY DELICATE WITH THE SHROUD it breaks easily.
Front right
![Image]()
front right bottom
![Image]()
11-
Gently remove the fan frame assembly. MAKE SURE YOU SEE EVERY LITTLE POINT IN TAKING IT OFF, THE NEXT ONE NEEDS TO BE MOUNTED ON EXACTLY THE SAME OR IT WONT WORK.
Once removed, clean all the crap.
(if you have a resistor now is the time to replace it use diagram to locate resistor, if its not there you dont have one.
http://realoem.com/bmw/showparts.do?...& hg=64&fg=55 number 8)
Hook up the fan, let the car run for a bit and see if the aux fan is working, there is no guarantee it will work, because the engine needs to be at a certain temp.
Put everything back together again.
Go to Autozone, buy R134a with a guage, turn ac on at 60 and fill the AC to the BLUE level of the guage.
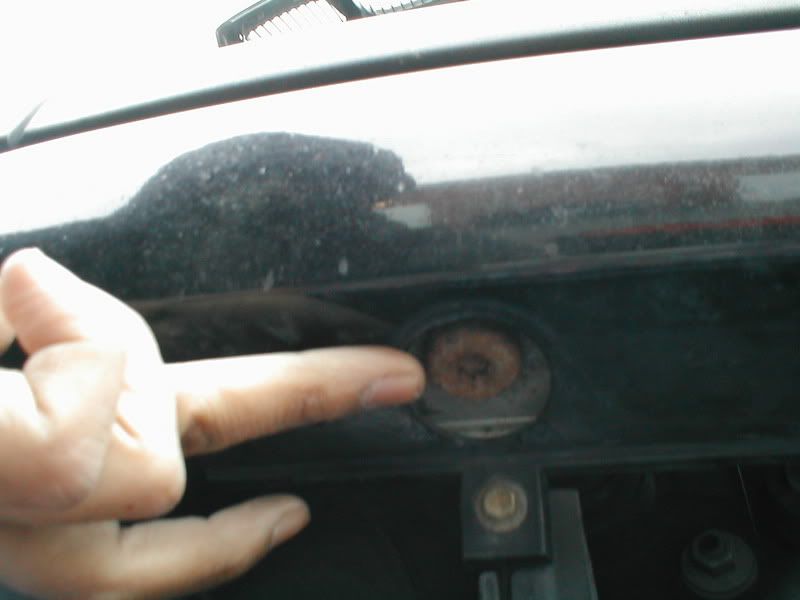
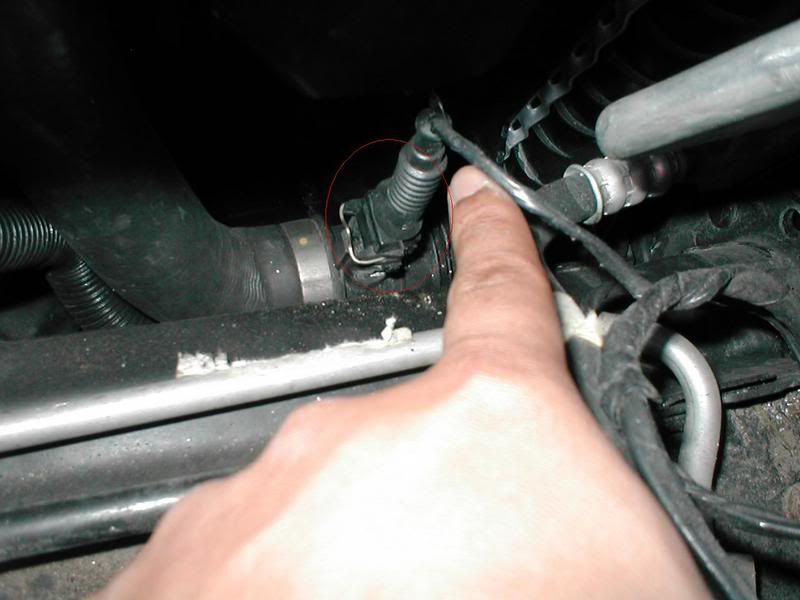
If after ALL of this your aux fan is not working, it could be the coolant temp sensor pictured below
![Image]()
Buy soda, drink, and look at the progress youve made. and now
Congratulations your Auxilary fan is now working. its better than paying 900 at the dealer right!
Cost
Aux fan assembly 297
50 amp fuse 2 dollars.
rivets about 3-5 dollars.
coolant temp sensor 22
resistors 60
soda 1.39
DISCLAIMER:
I am not responsible for any damages to your car upon using this or any other DIY write up. You assume all responsibility for damages or improper installation to your car.
QUESTIONS!?!?!
Pm me.
Thanks to E39Dream for helping me when i did it and being patient to answer my questions.
DISCLAIMER:
I am not responsible for any damages to your car upon using this or any other DIY write up. You assume all responsibility for damages or improper installation to your car.
Hello,
Here is a write up for a E39 Aux fan change. This was done on a 1999 528I and may differ slightly for your car.(resistors)
Job difficulty
2.5 wrenches out of 5.
Tools Needed
-1/4' ratchet
-3/8' ratchet
-8mm socket
-10mm socket
-13mm socket
-Needle nose pliers
-T45 torx bit
-8' extension
Parts Needed
- Auxiliary fan assembly - see No. 5 in link below
http://realoem.com/bmw/showparts.do?...& hg=64&fg=55
-Resistor No. 08 on link above.
- 50 amp fuse
- various fuses.
- Rivets Nos. 22 and 31 ten of each
http://www.realoem.com/bmw/showparts...& hg=51&fg=15
before ANYTHING.
Turn your ac on after your car has been operating for a while and is HOT
60 degrees and wait, if fan turns your aux fan is fine, if not you have a problem.
I have been told it can be your aux fan assembly itself, blow fuse, OR coolant temp sensor, or failed relay (ive been told this is very rare.)
FIRST THING, check the fuses in your glove compartment,
Fuses in glove compartment guide
This is a pic of fuse 75 and 76 lookin lying down above into your glove compartment from the passenger side foot well. That panel needs to be pulled BACK towards the passenger side seat with SLIGHT pressure to the floor and should come out. THE AREA THAT 75 and 76 are in is circled. you will reach in there, and grab the fuse and push UP towards the sky and it will come out.
Preparation
park your car on a flat leveled surface or your driveway.
put a blanket or sheet infront of your bumper, and set weights down so it doesnt fly away, i used my tool box.
here we go!
1-
Use the 8mm bolt to remove the 4 bolts that hold the headlight. Make sure you remove the bulbs from the housing of the headlamp.
there are 4 screws 2 on top and 2 on bottom.
2-
Remove 3 bolts from your wheel well, 1 above and 2 on bottom. refer below
Top bolt
Bottom bolt-the second one is just left to that, it may help to turn your tires side to side.
3-
Go and lie down on the sheet you just put in front of your front bumper.
You will look above the grills in your bumper and see little buttons, these are the plastic rivets. MAKE SURE YOU BUY EXTRA ONES FROM THE DEALER. 10 OF EACH TO BE ON THE SAFE SIDE IS WHAT I DID.
use the needle nose pliers and pull away the center pin, and pull out the rest of the rivet. there are about 4 rivets on each grill, pull them all out and pull away the grill.
4-
You will now see T45 torx bolt on the left of your license plate, and the right, the grill covered this area. Heres a pic
find both and unscrew using the T45 bit.
5-
Disconnect fog lights from the back
You should now be able to remove the bumper, MINE however was unremovable. so i had to remove the bumper shock absorber
pictured below
This isnt necessary to remove it, but if your having a tough time getting the bumper off, it helps.
after you have done 1-5.
have a friend support the bumper while you go to each side and SLIDE out the bumper from its track, it sits in a sliding track.

6-
This is what your car should look like now.
7-
Use a 10mm bolt and remove 3 bolts that hold this air snorkel.
the next one is to the right UNDER the snorkel.
last one is all the way to the right. cant miss it.
8-
Use the same method that you used for the grill on these plastic rivets
Remove ALL 3
9-
This rivet holds the power supply to the Fan, disconnect the wire this wire from the fan assembly
This is another rivet that i broke, but my dealer gave me a plastic zip tie and said this is better
10-
Remove 4 fan bolts, these are the 13mm bolts. there are 4. do the same on the opposite sides
also remove the kidney shroud which you removed the 3 rivets from. BE VERY DELICATE WITH THE SHROUD it breaks easily.
Front right
front right bottom
11-
Gently remove the fan frame assembly. MAKE SURE YOU SEE EVERY LITTLE POINT IN TAKING IT OFF, THE NEXT ONE NEEDS TO BE MOUNTED ON EXACTLY THE SAME OR IT WONT WORK.
Once removed, clean all the crap.
(if you have a resistor now is the time to replace it use diagram to locate resistor, if its not there you dont have one.
http://realoem.com/bmw/showparts.do?...& hg=64&fg=55 number 8)
Hook up the fan, let the car run for a bit and see if the aux fan is working, there is no guarantee it will work, because the engine needs to be at a certain temp.
Put everything back together again.
Go to Autozone, buy R134a with a guage, turn ac on at 60 and fill the AC to the BLUE level of the guage.
If after ALL of this your aux fan is not working, it could be the coolant temp sensor pictured below
Buy soda, drink, and look at the progress youve made. and now
Congratulations your Auxilary fan is now working. its better than paying 900 at the dealer right!
Cost
Aux fan assembly 297
50 amp fuse 2 dollars.
rivets about 3-5 dollars.
coolant temp sensor 22
resistors 60
soda 1.39
DISCLAIMER:
I am not responsible for any damages to your car upon using this or any other DIY write up. You assume all responsibility for damages or improper installation to your car.
QUESTIONS!?!?!
Pm me.


